Usercase1 : A simple update note for the client
Reading time:
Step 1: Create an Update Notes Table in ClickHouse
Begin by creating a table in ClickHouse to store the update notes. It is important not to use the 'log' engine; instead, use 'MergeTree' as the engine for this purpose. Below is an example SQL statement for creating the custom_release_note table:
CREATE TABLE custom_release_note
(
`release_version` String,
`release_date` DateTime,
`creator` String,
`status` String,
`note` String
)
ENGINE = MergeTree
PARTITION BY toYYYYMM(release_date)
ORDER BY release_version
SETTINGS index_granularity = 8192;
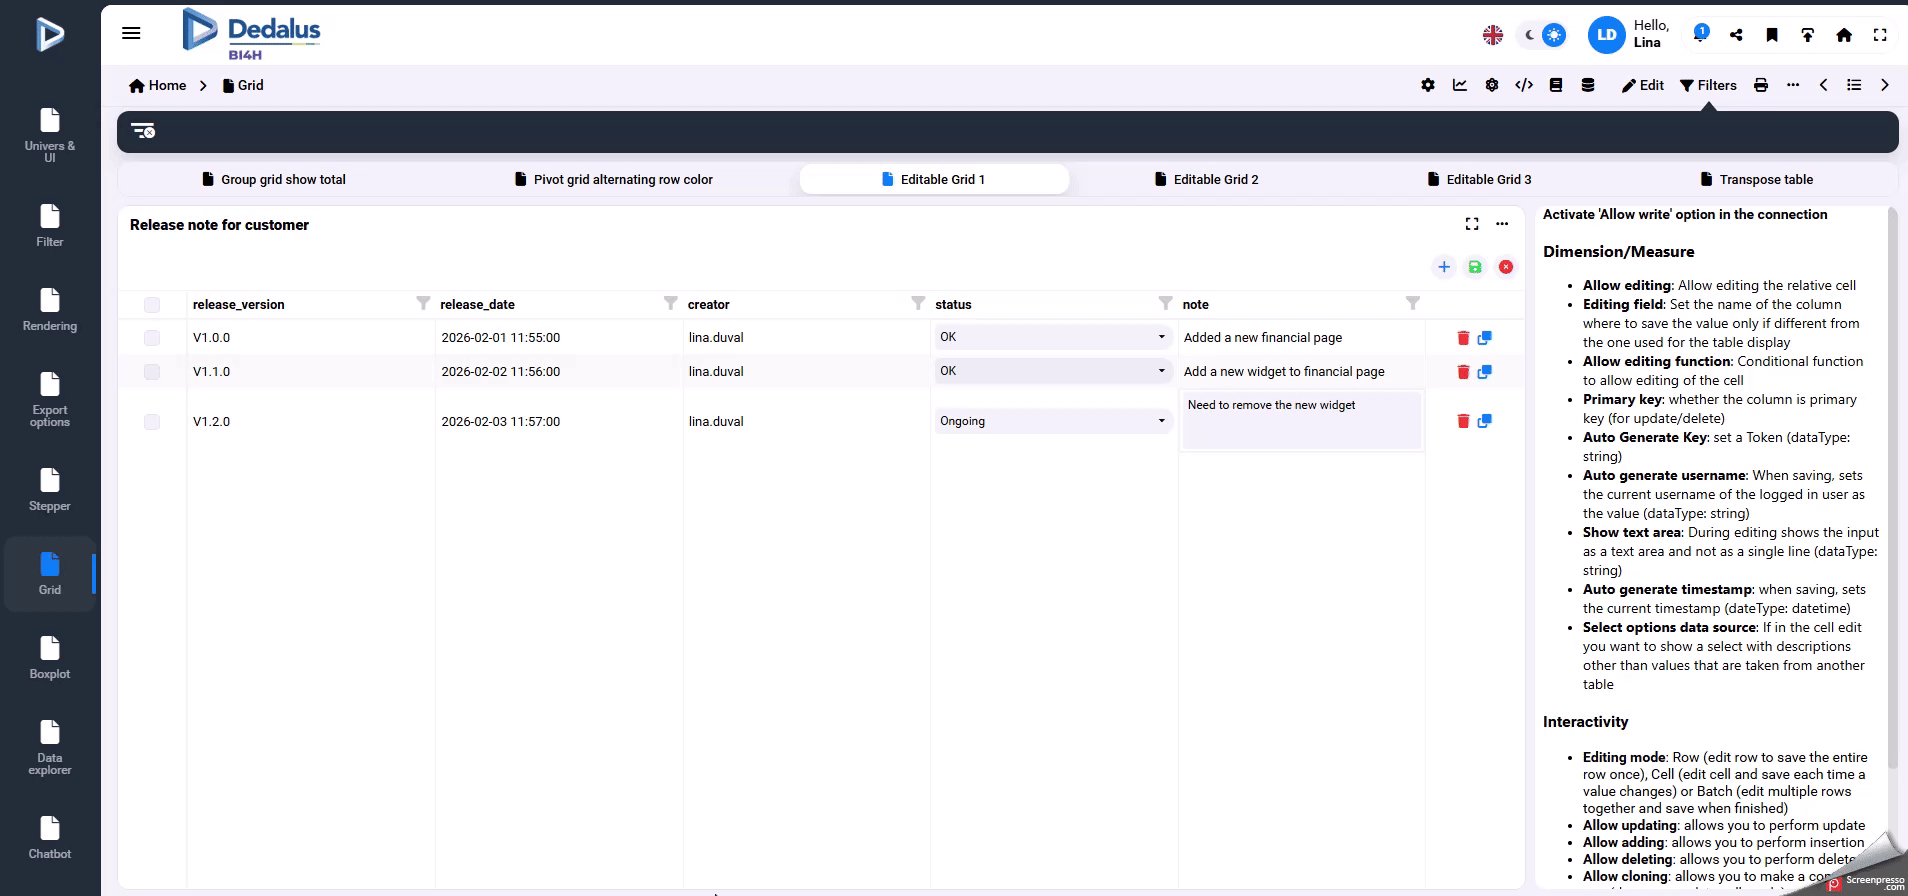
Step 2: Visualize the Table in BI4H
Navigate to BI4H visual and add a simple grid to a page. Populate this grid by including all fields from the custom_release_note table.
Step 3: Configure Editing Capabilities
- Enable Allow Editing and set Release_version as the Primary key in the Edition section.
- Enable Allow Editing for the Release_date field in the Edition section.
- Enable Allow Editing for the creator field. Also, activate the option to Auto generate username for this field in the Edition section.
- Enable Allow Editing for the status field. In this example, a field from a dedicated table containing predefined status values is added, so users do not need to manually enter the status value each time.
- Enable Allow Editing for the Note field in the Edition section.
Step 4: Enable Grid Interactivity
After configuring the fields, proceed to the interactivity tab. In the editing section, enable the following options:
- Allow Updating
- Allow Adding
- Allow Cloning
- Allow Deleting
- Set Batch as the editing mode
Once all dimensions and interactivity settings are in place, the editable grid for writing and tracking all dashboard updates is ready for use.
A video to show you how to use it.