Salta al contenuto

Documentation BI4H (EN)Documentation BI4H (EN)

  • Quick Start
  • Navigation
  • Interactions
  • Charts
  • Tables
  • Filters
  • Modules
  • Data Explorer
  • Self service
  • Quick Start
  • Navigation
  • Interactions
  • Charts
  • Tables
  • Filters
  • Modules
  • Data Explorer
  • Self service
  • Quick start

    • Start up

    • Version

    • Profile

    • Top tool bar

      • Change theme layout
      • Language selection
    • Elements of BI4H

    • What is the HUB

    • What is the APP

    • What is a module

    • Release

      • BI4H 5.6.0
      • BI4H 5.5.0
      • BI4H 5.4.0 (Beta)
      • BI4H 5.3.0
  • Navigation

    • Tiles & child buttons

    • Navigation bar

    • Stepper

    • Sidenav

    • Bookmarks

    • Schedule

    • Global search

  • Interactions

    • Point & click interaction

    • Change chart type

    • Export widgets

    • Fullscreen

    • Additional details

    • Modal windows

  • Charts

    • Lines

    • Colums

    • Composed lines-columns

    • Bars

    • Area

    • Bubble

    • Pie

    • Heatmap

    • Funnel

    • Treemap

    • Geographical maps

    • Gauge

    • Scatter plot

    • Range

    • Sankey

    • Radar

    • Boxplot

  • Grids

    • Grids option

    • Simple grid

    • Group grid

    • Pivot grid

    • Editable grid

      • Usercase1 : A simple update note for the client
      • Usercase2 : Dynamic configuration management
      • Usercase 3 : Flexible Age Range Configuration for Data Analysis
  • Filters

    • Smart Filter Bar

    • Filter layout

      • Single filter
      • Group filter
      • Expanded filter
      • Tree filter
      • Builder filter
      • Search filter
    • Filter types

    • Filter options

    • Interactions

  • Modules

    • Numbers

    • Tab

    • Buttons

    • Chatbot

    • List Indicator

    • Street maps

    • Aid to interpretation

  • Data Explorer

    • Introduction

    • Configuration

      • Edit module -> Generals
      • Edit module -> Aspect
      • Edit module -> Sharing
    • Create a new query

      • Add fields from Univers
      • Add fields from tables/snippets
      • Add a custom measure
      • Conditions sections
      • Advanced mode
    • Existing query

      • Run an existing query
      • Create a query using existing query
      • Organize your queries
    • Sharing

      • Share a query
      • Run a shared query
    • Export results

  • Self service

    • Your first dashboard

      • Adding a new page to the app
      • Adding modules to the page
    • Edit Module -> DATA tab

      • Dimension & Alternative Dimension
      • Measures & Alternatives Measures
      • Categories for alternative data
      • Name of dimensions & Measures
      • Sorting of Dimensions & Measures
      • Visibility of Dimensions & Measures
      • Measures Formatting
      • Measures Threshold
    • Edit Module -> ASPECT tab

      • Title customization
      • Show Legend & Customization
      • Box colors
      • Split module
      • Box Options
      • X Axis
      • Y Axis
      • Chart Colors
      • Type (Rotate, Invert, stack)
      • Zoom
      • Tooltip
      • Average
      • Values
      • Change type
      • Other (Aspect)
    • Edit Module -> INTERACTIVITY tab

      • Action
      • Filters
      • Data
      • Other (Interactivity)
    • Edit page - Generals tab

    • Edit page - Options tab

      • Options (Page)
      • Filters (Page)
    • Edit page - Info tab

    • Edit page - Other tab

    • Rendering examples

      • Column chart combined with a line
      • Stacked chart
      • Chart with opposite axis
      • Chart with a constant line
  1. Docs
  2. Grids
  3. Usercase 3 : Flexible Age Range Configuration for Data Analysis

Usercase 3 : Flexible Age Range Configuration for Data Analysis

Reading time:

This function is for advanced editors only.

Use case: Data often needs to be reformatted for easier interpretation, such as displaying age ranges instead of exact ages in statistics. Since these ranges may change based on the analysis, allowing customers to define age ranges using an editable grid meets their varied needs.

Step 1: Create an age range Table in ClickHouse

Begin by creating a table in ClickHouse to store age ranges. It is important not to use the 'log' engine; instead, use 'MergeTree' as the engine for this purpose. Below is an example SQL statement for creating the custom_age_range table:

CREATE TABLE custom_age_range
(
  `ID` UInt64,    
  `min_age` Nullable(Int8),
  `max_age` Nullable(Int8),
  `Description` Nullable(String),
)
ENGINE = MergeTree
PARTITION BY ID
ORDER BY ID
SETTINGS index_granularity = 8192;

Step 2: Visualize the Table in BI4H

Navigate to BI4H visual and add a simple grid to a page. Populate this grid by including all fields from the custom_age_range table.

Step 3: Configure Editing Capabilities

  1. Enable Allow Editing and set ID as the Primary key in the Edition section.
  2. Enable Allow Editing for the min_age field in the Edition section.
  3. Enable Allow Editing for the max_age field.
  4. Enable Allow Editing for the Description field.

Step 4: Enable Grid Interactivity

After configuring the fields, proceed to the interactivity tab. In the editing section, enable the following options:

  1. Allow Updating
  2. Allow Adding
  3. Allow Cloning
  4. Allow Deleting
  5. Set Batch as the editing mode

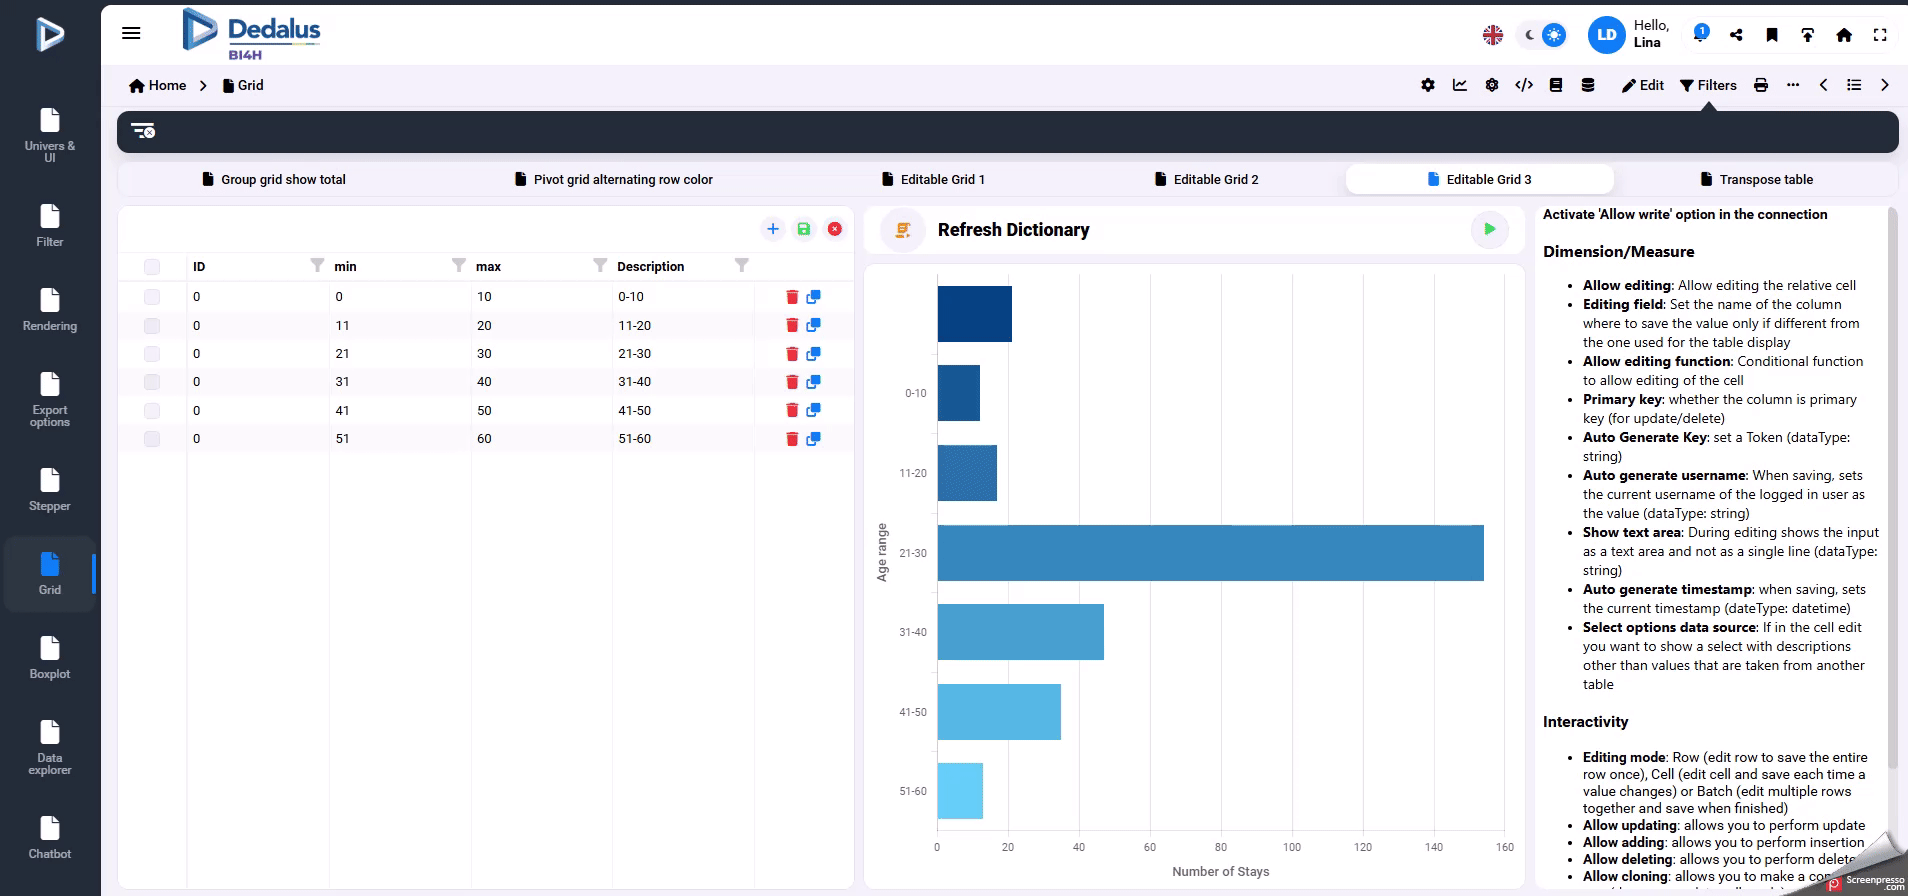
Step 5: Create a Dictionary to Identify Patient Age Ranges

To facilitate the identification of which age range a patient belongs to, create a dictionary. This dictionary will map specific text values to relevant parameters.

CREATE DICTIONARY IF NOT EXISTS age_range_dict
(   
    ID UInt16,    
    min_age UInt16,
    max_age UInt16,                 
    Description String
)
PRIMARY KEY ID
LAYOUT(range_hashed)                
RANGE(MIN min_age MAX max_age) 
SOURCE(CLICKHOUSE(TABLE 'custom_age_range' USER 'chAdmin' PASSWORD 'b14h@d3dCH' DB 'bi_dpi'))
LIFETIME(MIN 300 MAX 600);


Step 6: Create an Executable Query Snippet to Refresh the Dictionary Immediately After Changes

When modifications are made in the table, there may be a delay before the linked dictionary is updated. To view changes immediately, you can execute a query snippet to refresh the dictionary. 

Step 7: Build a Widget Based on the Dictionary

After setting up the dictionary and ensuring it is refreshed as needed, the next step is to build a widget that utilizes this dictionary. This widget will leverage the dictionary to display or process patient age range information as required.

A video to show you how to use it.


Last update: 4 February 2026
Views: 53

© 2026 Documentation BI4H (EN)

Powered by WordPress

All'inizio ↑ Su ↑